Welcome to the cutting drywall page. Often home owners are discouraged during the drywall process because of the worry associated with cutting in for outlets, lights, pipes and angles. This is not something you should let overwhelm you, but it can be a very easy task. With the right tools and a little help from our step by step guide you will have the confidence you need to complete your project.
There are several types of tools that can be used for cutting drywall
• Jab saw
• Roto Zip
• Dremel
• Razor knife
The most important tip to remember when cutting drywall is to measure twice and cut once this will save you every time. When measuring outlets, lights, pipes and angles the trick is to make a diagram this often done on the back of small scraps.
Step One:
Make a level line across your room, you will usually set this at about a 48 ½ inches. You will want to use a level to make sure your line runs true throughout the room. The reason you are using a level is often your floors or wall may be off.
Step Two:
Measure out the distance from the wall to the edge of your outlet both sides and right down the measurement. You will next measure down from your level line from top and bottom of your outlet and record measurements. Now measure the distance from the edge of your wall to the center of a stud where your drywall will end. Remember to measure it at both the top and the bottom this especially important in older home they are not always square.
Step Three:
Have a sheet of drywall facing white side toward you against the wall. You will now look at your diagram which illustrates which direction you measured from and make marks for your measurements on the drywall. With each mark that you make you will use a drywall square to make a straight edge. You can make the marks longer than they need to be because the pencil marks will be covered over with primer and paint.
Step Four:
Now that you have made all of your marks here comes the fun part, cutting the drywall. You should now have lines made for the total length of your piece and for your outlets. Cutting pieces to size is the easiest and most pain free part of the drywall cutting process. You will simply make a straight line with your drywall square with a pencil. You will then take a razor knife a score the drywall about an 1/8 of an inch all the way down the line. Once you have scored the drywall simple press the drywall away from you causing it to break on the cut line. Once you have snapped the drywall simply bend the sheet back until it forms a 90 degree angle and cut the brown side of the drywall rasp it even and your are now finished.
Step Five:
Cutting drywall outlets is pretty simple once you have your boxes drawn on the drywall. The first thing you will do is pull the bottom of your drywall out so that you are not cutting into the drywall behind it. Next take your razor blade and score the paper around the box you have just made. If you have a Roto Zip or Dremel you can ignore this step and simply cut it out following the lines.
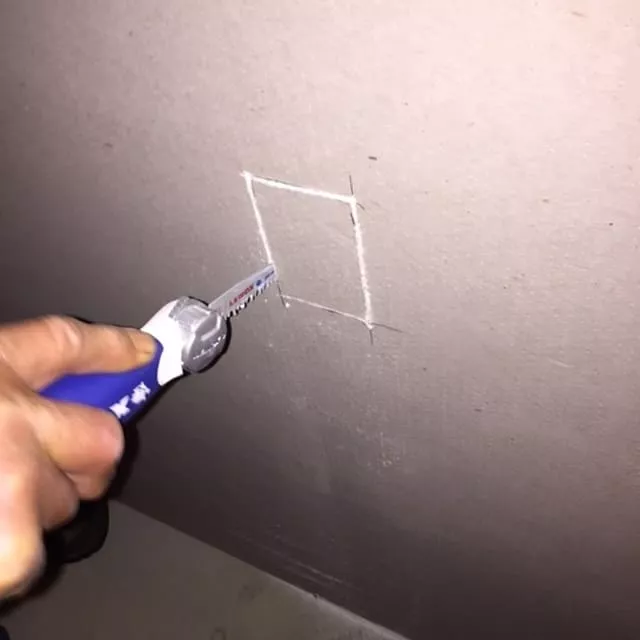
For those of who do not simply take your jab saw cut three sides of the drywall out I always find if I angle the jab saw a bit so that the back is wider than the front it is an easier fit. (See image below) Now punch the drywall scrap out and score the 4th side on the brown paper to remove the piece. The reason you cut the 4th with your razor knife is to prevent from tearing and breaking the piece since nothing will be supporting it.
You are now ready to start cutting drywall as always good luck and we are here if you need us every step of the way. You will now want visit ourDrywall Installation page.
Note for cutting in circle fixtures simply measure as you did for the outlet mark your center point and use a compass to draw a circle. Then simply cut the piece out with the drywall cutting tool of your choice.

