
The final step in thedrywall installationprocess is painting drywall.
If your drywall is not new construction drywall (ie., it has been painted in the past) you will follow these same steps, except you will likely need to apply painter’s tape around trim, something that most new construction painters will not.
Necessary Tools and Materials
- Several gallons of paint in your desired color & finish
- 3/8” Nap Paint Roller
- Roller Cage
- 2” Angled Paintbrush
- Paint Roller Tray
- Dropcloths or Plastic Sheeting
- 2” Painter’s Tape
- Rags
Step One: Drywall Painting Preparation
The first thing you need to do is ensure that your walls are ready for paint. Clear (or at the very least cover) any furniture or other valuables from the room.
Apply painter’s tape (not masking or any other kind of tape) to any woodwork present or other adjoining surfaces – such as ceilings – that you do not want to paint.
Ensure that the drywall to be painted has, at a minimum, one coat of primer/sealer before you begin painting, otherwise the raw drywall will soak up your paint like a sponge and not absorb evenly across the surface.
If it is not, go back to the previous step in the drywall installation process:
If your drywall has been previously painted it is recommended, but not always necessary, to apply a coat of primer before you repaint.
Step Two: Selecting Paint and Tools
When painting drywall, the quality of your finished product is very reliant upon both your preparation and the quality of your materials. The quality of various paints and materials vary widely, so it is important that you purchase quality, brand name materials.
Most major brand names from paint retailers such as Benjamin Moore, Sherwin-Williams, Pittsburgh, etc…, qualify as quality paints. Just don’t purchase a five-dollar discount gallon at your local dollar store.
The same is true for painting materials – rollers, brushes, etc… Get a good brand name product such as Wooster or Purdy, clean it well when you are finished, and you’ll have good materials for a long time.
Step Three: Painting Drywall
Using your 2” nylon-poly brush, cut in around the edges of your surface – ceiling, trim, adjacent walls and corners.
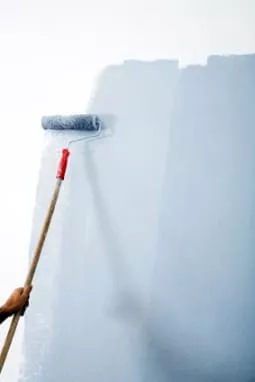
Next, load your 3/8” nap roller up with a moderate amount of paint and roll on the first coat. The paint is applied in a “W” shape, then spread out across the surface.
Finish each section with a smooth ceiling-to-floor stroke. This helps to eliminate roller marks.
Check the paint manufacturer’s instructions to find out how long the paint needs to dry before a second coat can be applied. Continue to apply new coats of paint until the drywall is finished to your satisfaction. Some darker colors (especially reds & purples) may need several coats.
Step Four: Removing Tape
Remove the painter’s tape from the trimwork and adjoining surfaces while the paint is still wet. If the new paint has dried and formed a “skin” between the tape and the surface, run a utility knife along the edge of the tape so that the tape does not pull your paint off with it.
You are now finished painting drywall, and finished with your drywall installation!